Most homeowners clean the lint trap after every drying cycle, but many ignore the dryer vent itself. That small oversight can lead to higher energy bills, poor dryer performance, unpleasant odors, and even fire hazards. Dust, lint, pet hair, and debris slowly build up inside the vent line and restrict airflow over time. Your dryer then works harder than it should, which increases wear and reduces efficiency.
Regular dryer vent cleaning in Boston keeps your appliance running safely and smoothly while helping you save money in the long run. This guide explains how dryer vent cleaning works, why it matters, and how you can clean your system step by step without unnecessary complications.
Signs Your Dryer Vent Needs Cleaning
- Clothes take longer than usual to dry
- The dryer feels extremely hot during operation
- A burning smell comes from the dryer or laundry room
- Excess lint appears around the dryer opening
- The laundry room becomes unusually humid after drying cycles
- The outside vent flap does not open properly
- Clothes feel hotter than normal after drying
- You notice musty odors on freshly dried clothes
- The dryer shuts off unexpectedly during cycles
- Your energy bills increase without a clear reason
- Lint buildup appears around the outdoor vent hood
- The dryer needs multiple cycles to dry heavy loads completely
How the Dryer Vent System Works
Before starting the cleaning process, it helps to understand how the system functions. The dryer vent moves hot, moist air from the dryer to the exterior of the house. Most systems use flexible or rigid ductwork that connects the appliance to an outdoor vent hood.
When the dryer operates correctly, air flows freely through the vent and exits the home efficiently. Lint particles travel with that airflow. Over time, however, lint sticks to bends, joints, and rough surfaces inside the duct.
Long vent runs, sharp turns, crushed hoses, and poor installation practices increase the risk of clogging. Older homes often contain outdated vent materials that trap lint more easily than modern metal duct systems.
Understanding these basics helps homeowners identify problem areas during cleaning and maintenance.
Steps of Dryer Vent Cleaning in Boston
Step 1: Disconnect the Dryer Safely
Safety should always come first before cleaning any appliance. Start by unplugging the dryer from the electrical outlet. If you use a gas dryer, turn off the gas supply valve before moving the appliance.
Pull the dryer carefully away from the wall to access the vent connection. Avoid dragging the unit aggressively because that can damage flooring or crush the duct behind the appliance.
Once you reach the vent connection, loosen the clamp holding the duct in place. Remove the vent hose gently and inspect the opening for visible lint buildup. Most homeowners find large clumps of lint near the connection point because debris collects there first.
This step creates access to the entire vent system and prepares the dryer for deeper cleaning.
Step 2: Clean the Dryer Lint Trap Thoroughly
Many people clean only the visible lint from the filter screen. However, residue from dryer sheets and fabric softeners often creates an invisible layer that blocks airflow.
Wash the lint screen with warm water and mild soap. Use a soft brush to remove stubborn residue. Allow the screen to dry completely before reinstalling it.
Next, vacuum the lint trap compartment inside the dryer. Narrow vacuum attachments work best for reaching deep areas where lint collects. This section often contains far more debris than homeowners expect.
A clean lint trap improves airflow immediately and supports the overall efficiency of the vent system.
Step 3: Vacuum the Vent Hose and Duct Opening
After disconnecting the hose, use a vacuum cleaner to remove loose lint from both ends of the vent line. Focus especially on corners and bends where debris gathers heavily.
A shop vacuum usually delivers stronger suction for this task, although standard household vacuums can still help. Insert the nozzle carefully into the duct opening and pull out visible lint.
At this stage, you may already notice major lint accumulation. Thick buildup near the opening often indicates even larger blockages deeper inside the vent system.
Cleaning these accessible areas improves airflow before you move on to deeper vent cleaning.
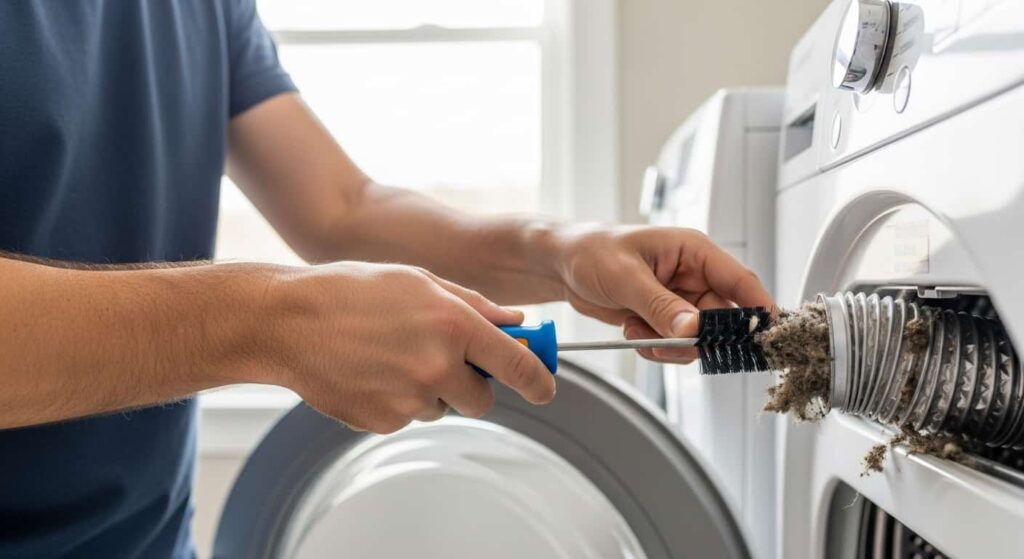
Step 4: Use a Dryer Vent Cleaning Brush
A dryer vent brush kit helps remove lint from deeper sections of the duct. These kits usually include flexible rods and rotating brushes that reach several feet into the vent line.
Insert the brush slowly into the duct while rotating it gently. Continue feeding the brush through the vent until you cover the entire length of the system. Pull the brush back carefully to avoid scattering lint throughout the room.
You may need multiple passes for heavily clogged vents. Large lint clumps often break loose during brushing, so vacuum debris as you work.
This step removes the buildup that ordinary vacuuming cannot reach. Thorough brushing restores proper airflow and reduces fire risks significantly.
Step 5: Check the Exterior Vent Hood
Many homeowners focus only on the indoor section of the vent and forget the outdoor exit point. The exterior vent hood also collects lint, dirt, and debris over time.
Go outside and inspect the vent cover carefully. Remove any lint buildup around the flap or screen. Make sure the vent flap opens freely when air passes through.
Bird nests, leaves, and debris sometimes block outdoor vents completely, especially during seasonal changes. Restricted outdoor airflow prevents the dryer from exhausting heat properly.
A clean exterior vent ensures the entire system works efficiently from start to finish.
Also read: DIY Dryer Vent Cleaning vs Professional Service: What’s Safe
Step 6: Reconnect Everything Properly
Once cleaning finishes, reconnect the vent hose securely to the dryer. Tighten the clamp firmly so air cannot escape into the laundry room.
Avoid crushing or bending the hose excessively while pushing the dryer back into place. Crushed ducts reduce airflow and create future lint buildup problems.
If your current hose looks damaged, torn, or overly flexible, consider replacing it with rigid or semi-rigid metal ducting. Metal vents improve airflow and reduce fire risks compared to thin plastic materials.
After reconnecting everything, plug the dryer back in and restore the gas supply if needed.
Step 7: Test the Dryer System
Run the dryer for several minutes and check airflow at the outdoor vent hood. Strong airflow indicates the cleaning process worked effectively.
Pay attention to unusual sounds, burning smells, or weak air movement during the test cycle. The dryer should operate more efficiently and dry clothes faster after proper vent cleaning.
Most homeowners notice immediate improvements in performance once airflow returns to normal.
How Often Should You Clean a Dryer Vent?
The ideal cleaning schedule depends on household usage. Families who run multiple loads daily usually need cleaning more often than smaller households.
In general, homeowners should clean dryer vents at least once a year. Homes with pets may require more frequent maintenance because pet hair accelerates lint buildup inside the duct system.
Businesses like laundromats, salons, and commercial facilities often need quarterly inspections due to heavy dryer usage.
Regular maintenance prevents emergency situations and keeps appliances operating efficiently year-round.
If you want reliable results without the hassle, trust Affordable Duct Cleaners. Our experienced team provides professional dryer vent cleaning services that improve efficiency, reduce safety risks, and keep your home running smoothly. Whether you need routine maintenance or a complete vent inspection, we deliver dependable service with long-term value.